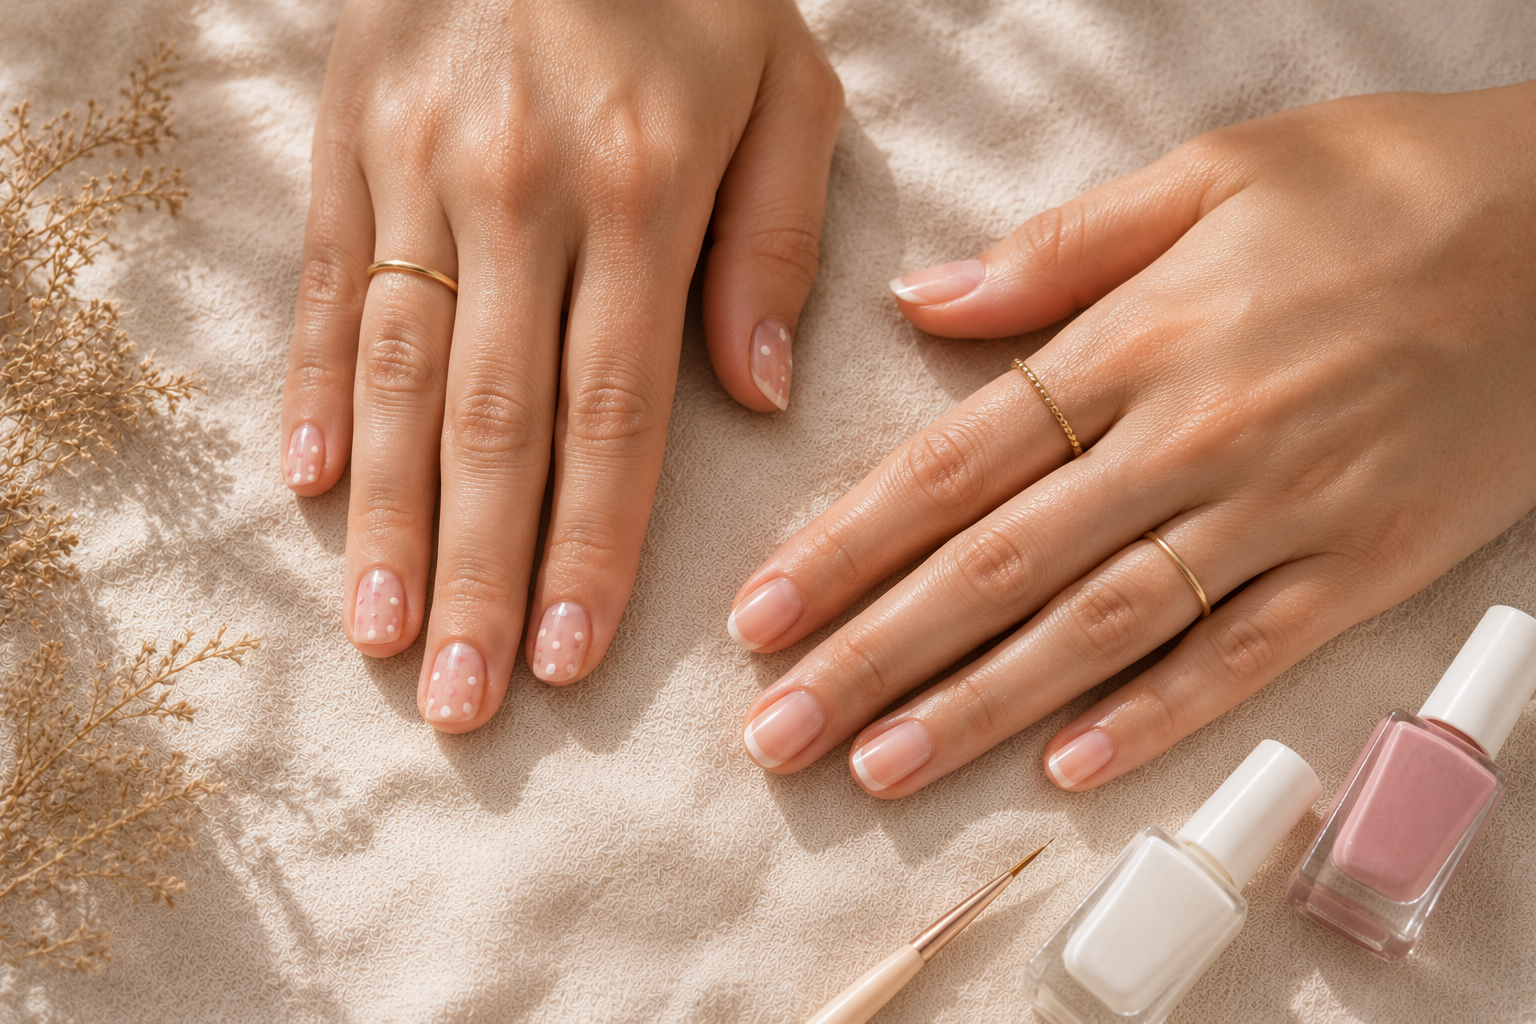
The starter toolkit (under $30)
You don't need a kit with 30 colors and stamping plates to start. The basics handle 80% of beginner-friendly designs:
- Base coat — protects nails and helps polish adhere. Skip this and your designs chip in 2 days.
- Fast-drying top coat — seals the design and adds shine. Worth investing in a good one ($8–12).
- 2–3 nail polish colors — start with a neutral base shade, a contrast color, and white (white is the most versatile accent in nail art).
- Dotting tool — for dots, micro-detailing, and small accents. A double-ended set is under $5.
- Thin striping tape OR fine detail brush — for clean lines, French tips, and geometric designs.
Free substitutes if you don't want to buy tools yet:
- A bobby pin works as a dotting tool — round end for big dots, opened end for fine ones
- A toothpick works as a fine detail tool
- Scotch tape (cut into thin strips) works as striping tape
- A small angled eyeliner brush works as a detail brush — and acetone-cleans easily
Don't buy a 30-piece nail art kit on day one. Most of the tools won't get used, and the included polishes are usually low quality. Start with the 5 basics, learn what you actually reach for, then add to your kit deliberately.
Prep that makes everything look better
The single biggest difference between salon nails and at-home nails isn't the design — it's the prep. Skip these steps and even simple designs look amateur.
- Remove all old polish with non-acetone remover. Even tiny remnants cause uneven base color.
- Wash hands with soap and water to remove all oils. Don't apply hand cream until after the manicure.
- Push back cuticles gently with a wooden orange stick. This creates a cleaner canvas at the nail base.
- File nails in one direction with a glass file. Round square edges slightly to prevent snags.
- Buff lightly if your nail surface is uneven — a quick pass only, never aggressive buffing.
- Wipe nails with a small amount of acetone or rubbing alcohol on a lint-free pad. This removes any remaining oils that cause polish to lift.
- Apply base coat in thin even strokes. Let dry 60 seconds.
This whole prep takes 5 minutes. It's the single highest-leverage thing you can do for at-home nail art.
The 10 designs, from easiest to slightly trickier
These are listed roughly from beginner to intermediate. Start with the first few, build confidence, then move on. None require advanced skill.
1. Single-color minimalist (the gateway design)
A perfectly applied single color is genuinely a "design" — and it's the foundation for everything else. Pick a color, apply two thin coats with 90 seconds between them, finish with top coat.
Why it works: Clean, even color in a thoughtful shade looks more polished than messy multi-color designs. A perfect dusty rose or muted olive reads as intentional and elegant.
2. Polka dots
The most beginner-friendly nail art exists. Apply your base color and let dry. Dip a dotting tool (or bobby pin) into a contrasting polish, then press onto the nail. Repeat in a pattern: scattered randomly, in a single row, or as a single accent dot.
Trick: Less is more. Three or four dots on a nail look intentional. Twenty dots look messy. White dots on dark colors and black dots on light colors are the cleanest combinations.
3. Classic French tip
The timeless design. Apply a sheer pink, beige, or clear base across the entire nail. Once dry, use thin striping tape to create a curved line near the tip, then paint the tip white. Remove tape immediately while polish is still wet.
Trick: If freehanding the white line, paint with the side of the brush rather than the tip — this creates a natural curve that follows your nail edge.
4. Micro-French tip (the modern version)
Same as the classic, but with the white tip painted only 1–2 millimeters wide instead of the traditional 4–5. Looks more modern, more minimalist, and forgives less-perfect technique because the line is shorter.
Trick: Use a fine detail brush or the very edge of your polish brush. The thinner the line, the harder mistakes are to spot.
5. Half-moon manicure
The reverse French — a contrasting half-moon shape near the cuticle instead of the tip. Apply your base color first. Once dry, place a small reinforcement sticker (the round paper kind from office supplies) at the cuticle area, with about half of it visible above the cuticle. Paint over the rest of the nail in a contrasting color, then carefully remove the sticker.
Trick: Office reinforcement stickers (made for paper holes) are the perfect curve for half-moons. Way more reliable than freehand.
6. Color blocking with tape
Apply your base color and let dry completely. Place thin strips of tape across the nail in a geometric pattern — diagonal, vertical, or in two parallel lines. Paint over with a second color. Remove tape while polish is still wet.
Trick: Press the tape edges firmly into the nail before painting. Loose edges let polish bleed underneath.
7. Gradient tips (sponge gradient)
The "ombre" effect that looks complex but isn't. Apply a base color and let dry. Cut a small piece off a regular makeup sponge. Paint two stripes of contrasting colors directly onto the sponge. Press the sponge onto your nail tip, dabbing repeatedly to blend the colors. Apply top coat to smooth.
Trick: Re-coat the sponge with fresh polish for each nail. The sponge dries fast and won't transfer cleanly twice.
8. Single accent nail
The lazy way to look intentional. Paint nine nails in a single color. Make the tenth (usually the ring finger) different — a contrasting color, a glitter polish, or one of the simple designs above. Done.
Trick: The accent color should connect visually to the main color. If your base is dusty pink, the accent could be a deeper rose, a complementary mauve, or a metallic version of pink. Random clashing colors look amateur.
9. Negative space
Modern, minimalist, and forgiving. Skip a base color or use a sheer pink so your natural nail shows through. Add only one element — a single thin diagonal line across the middle of the nail, a small geometric shape near the tip, or a tiny dot near the cuticle.
Trick: Negative space designs read as intentional only if everything else is pristine. Do the prep work meticulously.
10. Abstract line art
The trickiest of the easy designs. With a fine detail brush or striping tape, paint a single asymmetric line across each nail — the line can curve, intersect itself, or extend beyond the nail edge. Each nail can be slightly different.
Trick: Decide on the general "feel" before starting (curves vs. angles, thin vs. thick), then let each nail vary slightly. Trying to make all 10 nails identical guarantees frustration.
Technique tips that pros know
Small adjustments that separate "looks like I tried" from "looks like I know what I'm doing":
Wipe excess polish from the brush
The single biggest beginner mistake is too much polish on the brush. Wipe one side of the brush against the bottle's neck before applying. The brush should look slightly streaky, not loaded with polish.
Paint your dominant hand first
Counterintuitive, but it works. Your steady hand is fresh and least tired. Painting your dominant hand with your non-dominant hand is the harder of the two — do it while your skill is at peak.
Three-stripe technique for clean coverage
Don't paint random strokes. Place the brush in the center near the cuticle, push it back gently toward the cuticle, then pull it forward to the tip. Repeat once on the left side, once on the right. Three strokes total per nail.
Always paint the free edge
Run a thin layer of polish across the very tip of each nail (the "free edge"). This seals the polish and dramatically extends wear — sometimes by 3–4 days.
Wait 90 seconds between layers
Most chipping happens because layers weren't dry. Set a timer. 60 seconds minimum, 90 seconds is safer. Patience here saves redoing the whole manicure.
If you're prone to smudging, paint your nails before bed — but not right before bed. Apply at least 30 minutes before sleeping, with top coat applied last. Your nails will be 95% dry by the time you sleep.
How to fix mistakes without starting over
Mistakes happen even to professionals. The key is fixing them surgically instead of redoing everything.
For polish on skin around the nail
Wait until everything is fully dry. Dip a small flat brush or angled eyeliner brush in nail polish remover. Use the brush to clean up edges precisely — don't use a cotton swab, which leaves fibers.
For a smudge on a fingernail
If still wet: dab with a damp finger to lift the smudge slightly, then smooth over with another thin coat. If dry: gently buff the smudged area with a soft buffer block, then repaint that nail only.
For uneven coverage
Apply a thin third coat. Three thin coats almost always cover better than two thick ones. Each coat needs to be very thin — barely-there levels of polish.
For a chipped nail before everything is dry
If the chip is fresh: lightly press the chipped piece back into place with a clean fingertip. Apply a thin layer of top coat over the area to seal it.
For a totally botched nail
Don't try to fix it on top. Wait until dry, remove just that one nail's polish with non-acetone remover, and start that nail over. Trying to layer over a mess only creates a worse mess.
Making at-home manicures last
Even simple designs hold up for 7–10 days with the right approach. The honest tricks:
- Always seal with top coat, including across the free edge of each nail. The tip is the first place chipping starts.
- Apply fresh top coat every 2–3 days. This refreshes the seal and adds visible shine. Even a single layer extends wear meaningfully.
- Wear gloves for dishes and cleaning. Hot water and soap kill manicures faster than any other single thing.
- Apply cuticle oil daily. Hydrated nails flex with movement instead of cracking. Counter-intuitively, oily cuticles actually prevent polish from lifting.
- Avoid using nails as tools. Opening cans, scratching off labels, peeling stickers — these are responsible for almost all "sudden" chipping.
- Don't soak in hot water. Long hot showers, baths, hot tubs — they all soften polish and lift the edges.
Most people who say "polish doesn't last on me" are actually doing one or two specific things wrong. Identify which (usually it's not sealing the free edge or skipping the base coat), fix those, and watch your manicures suddenly hold up for over a week.
The bottom line: Easy nail art doesn't require talent — it requires good prep, the right basic tools, and patience between layers. Start with the simplest designs (single color, polka dots, micro-French), get the prep and technique right, and the prettier designs become natural extensions. The salon-quality look at home isn't about skill; it's about not skipping the boring steps.