Why proper removal matters
Here's what most beauty content gets wrong: gel polish itself isn't particularly damaging to nails. The cured gel sits on the surface of the nail plate. It's chemically stable, doesn't penetrate deeply, and doesn't break down nail keratin during normal wear.
Almost all "gel nail damage" comes from improper removal. Specifically, two practices cause the vast majority of it:
1. Peeling the gel off
When gel polish is applied to a properly prepped nail, it bonds to the upper layers of the nail plate. When you peel the gel, the bond doesn't break at the polish-nail interface — it breaks inside your nail, taking layers of the nail plate with it.
This is why peeled nails look so visibly damaged — they're physically thinner. The thinner layers underneath are more flexible and bend more easily, making nails feel "weak." It's not weakness; it's missing layers.
2. Scraping with metal tools
Using metal pushers or scrapers to remove gel that hasn't fully softened from acetone scrapes off nail plate layers along with the polish. Same mechanism as peeling — the metal tool finds the weakest point, which is often inside the nail rather than between polish and nail.
What proper removal actually does
Acetone slowly dissolves the chemical bonds inside the cured gel polish itself. Given enough soak time, the gel softens to where it lifts cleanly off the nail surface — taking no nail layers with it. The nail underneath looks identical to how it did before the gel was applied.
This is why the same person can have completely healthy nails after months of gel manicures (properly removed) or visibly damaged nails after a few rounds of peeling.
If you've been removing gel by peeling and now want to switch to soaking, your nails will need 3–6 months to grow out to fully healthy plates. The damaged layers have to grow off the end before fully restored thickness appears. Patience plus proper care during regrowth genuinely produces healthy nails.
The supplies you need
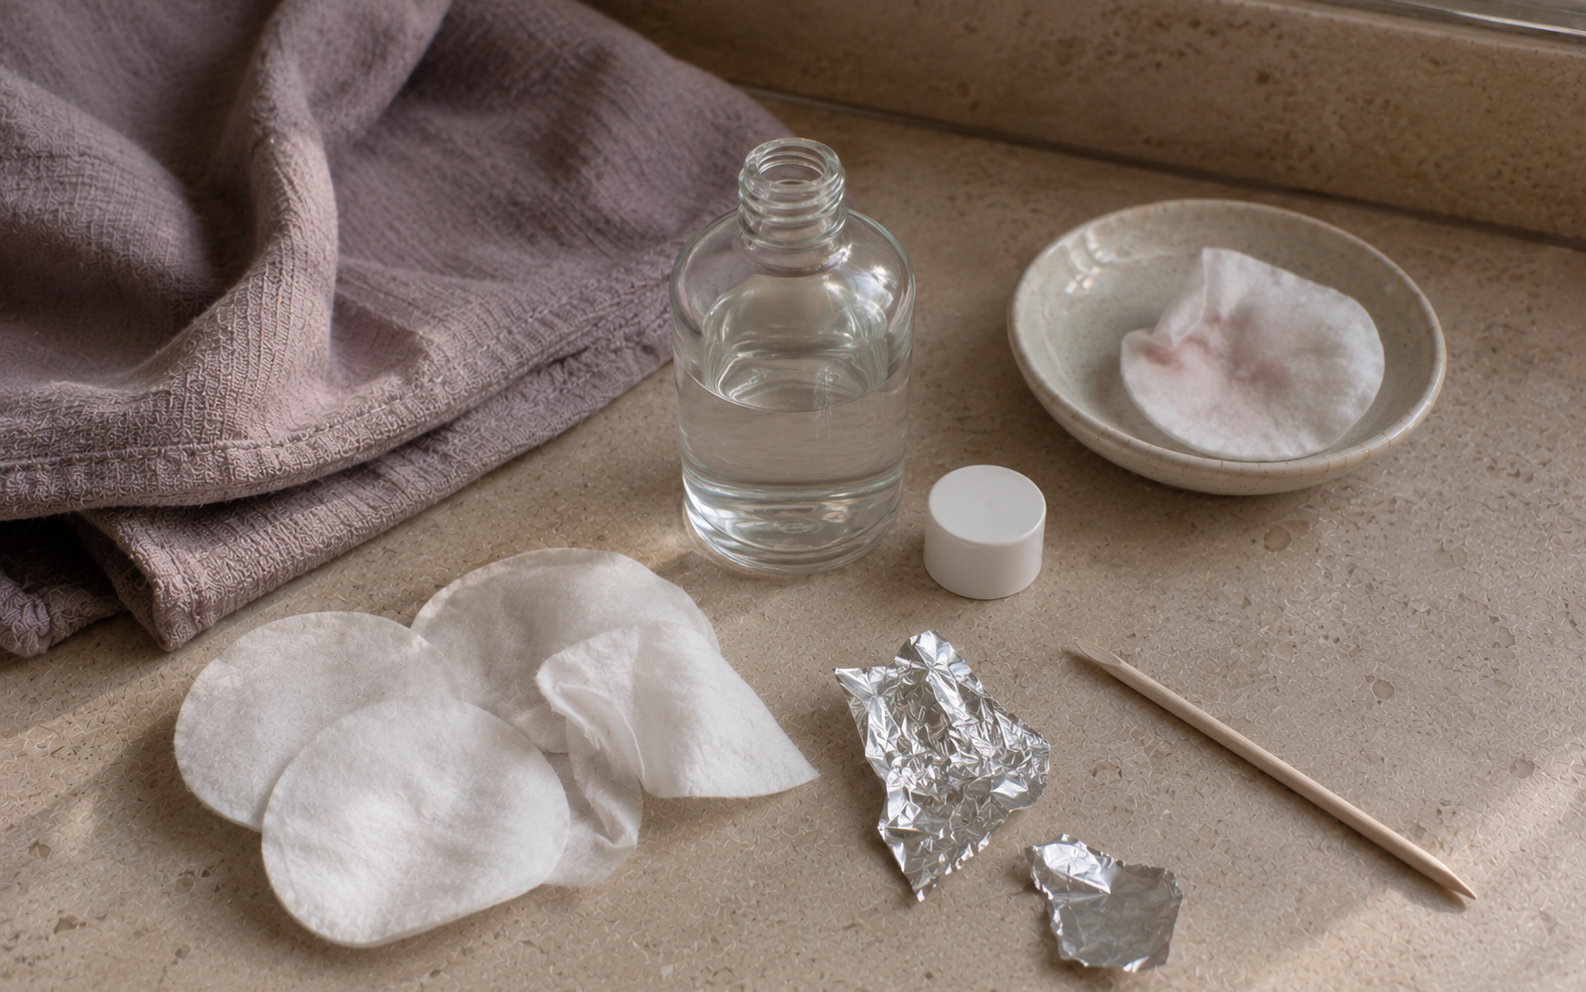
The essential list. Most items are cheap and last through many removal sessions.
| Item | Purpose | Approximate cost |
|---|---|---|
| Pure acetone or 100% acetone | Dissolves cured gel | $3–6 per bottle (drugstore) |
| Cotton pads or cotton balls | Hold acetone against nail | $2–4 per pack |
| Aluminum foil | Seal cotton against nail | Often already in kitchen |
| Fine nail file (180 grit) | Break the gel top coat seal | $2–5 |
| Wooden orange stick | Gently lift softened gel | $1–2 |
| Cuticle oil | Rehydrate after removal | $5–15 |
| Optional: gel removal clips | Reusable alternative to foil | $8–15 for a set |
| Optional: petroleum jelly or Vaseline | Protect skin around nail | Already at home |
What you don't need
- Drugstore "gel removers" that aren't acetone-based — most don't work effectively on properly cured gel
- Electric nail drills or buffers — overkill for home use, and prone to causing damage
- Specialty "gel removal kits" with extra steps — most are just acetone with branding
- Hot water or steam soaks — promoted by some content but less effective than acetone
About acetone safety
Acetone is generally safe for occasional skin and nail exposure, but it's drying and irritating with frequent use. Practical precautions:
- Work in a well-ventilated area (open window or fan)
- Apply petroleum jelly around the cuticle area before soaking to protect skin
- Wash hands thoroughly after removal
- Apply cuticle oil and hand cream immediately after
- If you have eczema, sensitive skin, or asthma, take extra care with ventilation
Acetone is highly flammable. Keep away from heat sources, lit candles, open flames, and don't smoke during gel removal. The fumes can ignite. Most people have used acetone safely for decades, but the basic precaution applies.
The step-by-step method
The full procedure. Once you've done it twice, the technique becomes muscle memory.
Step 1: Set up your workspace
- Sit at a table with good lighting
- Lay down a paper towel or old hand towel to catch drips
- Have all supplies within reach
- Cut foil into 10 pieces roughly 3 × 4 inches (large enough to wrap each fingertip)
- Tear cotton pads or balls into 10 pieces, each roughly nail-sized
Step 2: File the shiny top coat
This is the most critical step that people skip. Gel top coats are sealed and acetone can't penetrate cured gel through that seal.
- Use a 180-grit file (the medium-rough white side of most beauty files)
- Gently buff the surface of each gel nail until the shine is gone — the surface should look dull and slightly textured
- You're filing the gel, not the nail underneath — stop as soon as the shine disappears
- Don't file aggressively or try to file the gel off entirely; you're just breaking the seal
- Repeat for all ten nails before moving on
Step 3: Protect the surrounding skin (optional but recommended)
Apply a thin layer of petroleum jelly or Vaseline around the cuticle area of each nail. This protects the skin from acetone drying. Skip the nail itself — the acetone needs to reach the gel directly.
Step 4: Saturate cotton with acetone
Pour pure acetone into a small bowl or cup, then dip a cotton pad until soaked but not dripping. Press the soaked cotton onto your nail, covering it completely.
Acetone needs to be in continuous contact with the gel — not just a quick wipe. The cotton holds the acetone in place while you wrap.
Step 5: Wrap with foil
Place a piece of foil over the cotton-covered nail and wrap it around your fingertip, sealing the cotton in place. The foil holds the acetone-soaked cotton against the nail and prevents evaporation.
Foil should be snug but not painfully tight. The seal is what matters — the acetone shouldn't leak out.
Repeat on each nail.
Step 6: Wait 10–15 minutes
This is the soak time. Sit with hands relaxed, ideally with hands resting flat or held warm (warmth speeds the chemical breakdown).
Don't rush this step. Removing the foil after 5 minutes and finding gel hasn't softened means you'll resort to scraping — which damages the nail. Waiting the full 10–15 minutes is the entire point.
Some people use this time to do something else — read, listen to a podcast, watch something. Anything that prevents the temptation to check early.
Step 7: Test one nail
After 10 minutes, slowly twist and pull one foil wrap off — twisting helps because the motion brings any softened gel away with the cotton.
- If gel comes off cleanly with the cotton → it's ready
- If gel is partly softened — you can see it's smudgy or lifted at the edges → close to ready; give 2–3 more minutes
- If gel still looks intact and hard → re-wrap and wait 5–10 more minutes
Step 8: Gently lift softened gel
Once a nail's gel has softened, use a wooden orange stick to gently scrape away the remaining gel. Key word: gently. The softened gel should come off easily.
- Hold the orange stick at a 45-degree angle
- Scrape from cuticle toward nail tip
- If gel resists, stop — re-wrap with acetone for another 5 minutes
- Never force, scrape hard, or use metal tools
Step 9: Repeat for each nail
If you wrapped all 10 nails simultaneously, work through them one at a time — they'll be at slightly different stages of readiness.
Step 10: Final cleanup
Wash hands with soap and warm water to remove acetone and any remaining gel residue. The skin around your nails may feel dry — this is normal acetone effect.
Step 11: Immediate aftercare
- Apply cuticle oil generously to each nail and the surrounding skin
- Massage in for 30 seconds per nail
- Apply hand cream over the top
- Let everything absorb for several minutes before doing anything with your hands
Gel removal clips are a reusable alternative to foil. They're a small set of plastic or silicone clips that hold cotton in place on each fingertip. Easier to take on and off than foil, slightly more comfortable, and reusable for years. Worth the small investment if you remove gel regularly.
If gel won't come off
Common scenarios when removal doesn't go smoothly:
Gel hasn't softened after 15 minutes
Causes:
- Insufficient filing of the top coat — gel surface is still sealed, blocking acetone penetration
- Cotton not saturated enough with acetone
- Foil not sealed tightly, allowing acetone to evaporate
- Particularly thick or aged gel (older manicures, multiple layers, or hard gel rather than soft gel)
Solutions:
- Re-file the top coat to ensure the seal is broken
- Re-saturate cotton with fresh acetone
- Re-wrap tightly with new foil
- Wait another 10 minutes
- If still resistant, consider a salon removal
Some gel lifts but bits remain stuck
This is normal — gel often comes off in pieces rather than as one clean unit. Re-wrap the resistant areas with fresh acetone-soaked cotton for 5 more minutes. The remaining bits should soften.
Don't scrape stubbornly with the orange stick at hard remaining gel. Each time you scrape resistant gel, you're scraping nail layers underneath. Patience over force.
Gel comes off too easily and looks "scraped"
If the gel comes off in flakes that look like they have a milky or pearly back to them — that's nail plate coming off too. Stop immediately. Apply cuticle oil and consider letting nails rest before continuing. The gel-nail bond has failed and you're now removing nail layers.
One or two nails resist while others remove easily
Often related to nail growth — newer gel near the cuticle can be different thickness than the older edge. Try filing those nails' top coats more thoroughly, then re-wrap with fresh acetone.
Gel is over a year old / extension gel
Old gel or hard gel extensions don't dissolve in acetone effectively. These require professional removal with an e-file. Trying to remove these at home with acetone alone typically fails. Visit a salon for proper removal.
Aftercare to protect your nails
The first 48 hours after gel removal are when nails are most vulnerable. Aftercare matters significantly.
Immediately after removal (first hour)
- Apply cuticle oil to every nail — generous amounts, massaged in
- Apply hand cream over the top
- Avoid washing hands with hot water
- Avoid hand sanitizer for a few hours (also drying)
- Don't apply regular polish for at least 1 hour
First 48 hours
- Re-apply cuticle oil 2–3 times per day
- Wear gloves for any wet work (dishes, cleaning, gardening)
- Use moisturizing soap rather than antibacterial soap
- Consider a nail strengthening base coat or treatment
- Avoid bending nails or using them as tools
First week
- Daily cuticle oil application
- Hand cream after every hand wash
- Allow nails to "breathe" — skip another gel manicure for at least 1 week, ideally 2
- If using nail strengtheners, apply per product instructions
- Consider a clear strengthening polish for protection if you want polished-looking nails without gel
Strengthening products worth considering
| Product | Type | Notes |
|---|---|---|
| OPI Nail Envy | Strengthener and base coat | The most-recommended; multiple formulas for different nail types |
| Sally Hansen Hard As Nails | Strengthener | Budget option; effective for many users |
| Nailtiques Formula 2 | Protein-based strengthener | For weak, peeling nails |
| Essie Nail Hardener | Strengthener | Affordable; widely available |
| Olive & June Nail Strengthener | Strengthener with vitamins | Higher price; nicely formulated |
Between gel manicures
If you do regular gel manicures, the time between them is when your nails recover:
- Take at least a 1-week break between gel sets
- Apply cuticle oil daily even when nails are bare
- Consider a nail strengthener treatment during break periods
- Watch for signs of cumulative damage (peeling, thinness, ridges) — they're a signal to take a longer break
If you've already peeled — what to do now
If you've been peeling gel polish and your nails are now damaged, the path to restoration is real but requires patience.
What damaged nails look like
- Visibly thinner than they used to be
- Soft or flexible where they used to be firm
- Peeling in layers, especially at the tips
- White patches where the nail plate is thinned
- Ridges or uneven surface
- Breaking easily
The recovery plan
- Stop peeling immediately. Future damage compounds existing damage. This is non-negotiable.
- Apply cuticle oil 2–3 times daily for at least 4 weeks. Hydration restoration is the first priority.
- Use a nail strengthener treatment. Daily application during recovery period.
- Keep nails short. Length puts mechanical stress on damaged nails. File them short and keep them filed short until thickness returns.
- Wear gloves for wet work. Damaged nails are more porous and absorb water faster, which weakens them further.
- Skip nail polish for at least 2–4 weeks. If you need coverage, use a strengthening base coat (which acts as treatment + cosmetic).
- Wait at least 3 months before resuming gel manicures, and use proper soak-off removal going forward.
Realistic timeline
Nails grow approximately 3mm per month. Fully damaged nail plates need 4–6 months to grow out completely — meaning genuine full recovery is months, not weeks. But noticeable improvement happens within 2–4 weeks of starting proper care. Visible thickness returns gradually as new healthy nail grows from the matrix.
If your nails have been peeling-damaged for years, you may need a 6-month nail rehabilitation period — careful care, no gel, regular trimming, daily oil. It's frustrating but produces genuinely healthy nails. The temptation to "fix it with gel" perpetuates the cycle; the cure is patience.
Alternative methods and their honest assessment
Several alternative removal methods circulate online. Honest assessment of each:
Hot water soak
Promoted as gentler than acetone. Honestly: ineffective for properly cured gel polish. Hot water can soften some lower-quality polishes briefly but doesn't break the chemical bonds in cured gel. Wasting time on hot water soaks often leads to peeling out of frustration.
Steam removal
Some commercial products use steam to soften gel. Some work modestly; most don't work as well as acetone. Not worth the equipment investment for home users.
Electric nail file (e-file)
Salon-grade tool that grinds gel polish off. Effective when used by professionals; dangerous in untrained hands. Easy to grind into nail plate accidentally. Not recommended for home use unless you're trained or willing to invest time learning safely.
Vodka or other clear alcohol
Internet hack that doesn't work. The alcohol percentage in spirits is too low to break down cured gel polish. Pure acetone or properly formulated remover are the only effective options.
Filing it all off
Some recommend filing the entire gel layer off with a 100-grit file. Possible but tedious (45+ minutes), risky (easy to file too far into nail), and produces dust that's irritating to breathe. Not recommended.
Specialized "non-acetone" gel removers
Most don't work for actual cured gel polish — they may work on some gel-look hybrid polishes but not on true gel. Read product instructions carefully; if it doesn't specifically state it removes UV/LED cured gel polish, it probably doesn't.
Preventing damage between gel manicures
The most important habits for nail health while doing regular gel:
Application matters
- Choose a manicurist who doesn't aggressively file nails before application
- Avoid manicurists who use electric files heavily on the natural nail before gel
- Watch for manicurists who push cuticles aggressively or cut them — both create entry points for gel to bond too deeply
Time between gel sets
- 1-week minimum break between gels, regardless of how good your nails look
- 2-week break is genuinely beneficial
- Monthly "rest week" if you wear gel year-round
- Periodic 1-month break every 6 months allows complete recovery
Daily maintenance
- Cuticle oil daily, even with gel on
- Hand cream after every wash
- Gloves for wet work
- Don't use nails as tools (opening cans, scraping things)
Watch for warning signs
Stop gel manicures and let nails recover if you notice:
- Visible thinning of nail plate
- White or chalky patches
- Peeling that wasn't there before
- Sensitivity or pain
- Persistent ridges
- Lifting of gel at the cuticle (suggests too thick application or sensitivity)
When to go to a salon instead
At-home removal works for most people in most situations. A few scenarios make professional removal worth the cost:
Worth going to a salon
- Very old gel (4+ weeks past intended removal time)
- Hard gel extensions (different removal chemistry; salon e-file required)
- Acrylic or dip powder rather than soft gel
- Damage already visible — having a professional assess and remove carefully prevents worsening
- You've tried at-home removal and gel isn't lifting
- You don't have time for the full 20–25 minute process
- You're prone to over-scraping at home (knowing yourself matters)
What to ask the salon
- "Do you use an e-file or only soak-off?"
- "How long do you soak the gel before removing?"
- "Can you apply cuticle oil before and after?"
A good nail technician will soak before scraping rather than relying on the e-file alone. Some technicians use e-files extensively because it's faster — but at-home soak-off is gentler if you're willing to wait the 15 minutes.
The bottom line: Removing gel polish properly is straightforward but requires the right technique. File the top coat to break the seal. Soak with pure acetone in cotton and foil for 10–15 minutes. Gently lift the softened gel with a wooden orange stick. Apply cuticle oil generously afterward. Never peel, never force, never scrape resistant gel. Most "gel damage" comes from improper removal rather than gel itself — switching to proper soak-off removal alone produces visibly healthier nails within months. The technique takes practice but becomes routine quickly. Twenty minutes once every 2–4 weeks is a reasonable cost for nails that stay healthy through repeated gel manicures rather than degrading over time.
This article is for general educational purposes only and is not a substitute for personalized professional advice. Persistent nail damage, infection, or unusual symptoms should be evaluated by a qualified healthcare provider or licensed nail technician.